Wednesday, June 27, 2012

Kwik Sew 3801


I fell in love with this little red number last year.


OMG!  Do you remember this green disaster?  LOL.

I made this up last summer.  This is a cotton knit fabric that was super cheap and I thought it would be great to use for knit top muslins.  I cut out the large, because that's the size I usually take, and as you can see here, it's just a shapeless bag.  Get a load of the neckline; talk about low.  It's also too short.


Sooo...after recently seeing a friend wearing the top made with some very thin ITY knit and it looked great on her, I decided to give it another chance. 


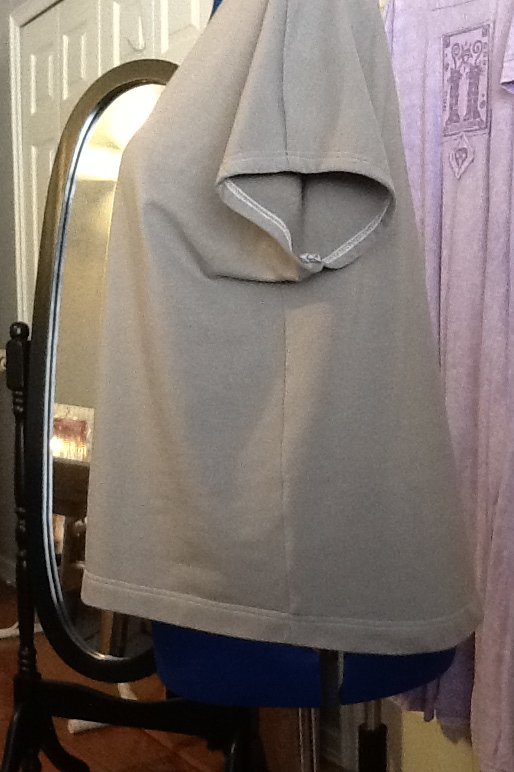
Here I've made it up again, this time in a medium.  I lengthened it by 2 inches and brought the neckline up by 1 1/2 inches.  I still think it's a little big and the neckline is lower than I like.  Which, btw, I changed.  Instead of using a band around the neck, I just turned it under and cover stitched it.  BUT, it's much better and it looks much nicer on me than on Ruby here.  LOL.  Notice how I toned down the print?  I got this fabric from Sawyer Brook super cheap early this spring and am just now getting around to making it up.

I'm going to make it again, this time in a size small.  Sheesh!  Talk about vanity sizing.  I haven't worn a small in like FOREVA!  LOL.

I think the key to this particular look is to use a VERY drapey fabric and to keep the print small if using one.  OH, and the correct size.  LOL.

Here's a couple more pictures.


I like this fabric; it has a little curlycue printed in metallic.  Dresses up this otherwise plain knit.


This is a seriously easy knit top to make up.  I think it took me an hour and a half and it took that long because I was putzing around.  


One thing I thought I would comment on...I thought these super thin knits would be hard to work with.  I really haven't found that to be the case.  Other than testing the fabric (which I normally do anyway), I really haven't had any issues.


This black & white version is a small and I like it much better.   Talk about vanity sizing.  LOL.


That's all folks!


PS.  Today is my 2 year anniversary of this blog.  LOL.  Who da thunk it?

Monday, June 25, 2012

Butterick 5786 - The Review


I think this pattern is a keeper and one I'll make several times.  With that said, I'll note the changes I will be making the next time I sew this shirt.  I had an inkling that it might be a bit too short in the front and I unfortunately didn't pay attention to that niggling thought.  I'll add 2 inches to the front next time around.  I think I'll make the short sleeves a bit shorter too.  They are a bit long for my taste.  I'll probably shorten them by 1 1/2 inches.

To sum it up, these are all of the changes I have/will make the next time around:  Reduced the back length by 2 inches, add 2 inches to the front, added an inch in width in the back, and shorten the sleeve by 1 1/2 inches.

By now you know I embroider my buttonholes.  I've been using Madeira Cotona 80wt. cotton thread for most of the buttonholes I do now.  I just love the feel of a nice lightweight buttonhole.  The nicer fabric and sewing/embroidery stores carry it and if you can't get it locally, you can purchase it on-line.  Try it once; I think you'll like it.  

Oh, I will mention this because it's not in the description of the top.  It has a dropped shoulder, by about 1 1/4 inches and I'm not known for being narrow shouldered.  Something else to keep in mind...

I like the fit; I like the way it feels to wear this shirt.  Another one that feels like you're wearing nothing.  LOL.  These pictures have been lightened quite a bit to show detail.

I know it's nicer to see pics of the item on me, but I have to get cooperation from Alan and he has this thing called work.  LOL.  I'll try to get pictures of me wearing the shirt a capri's together later on in the week. 

This shirt is really very easy to make.  I'd rate it as an intermediate.  I didn't use the pattern directions since I've made up this type shirt so many times.  But I did look at them and they seemed easy.  I couldn't do my normal narrow hem though.  This fabric (peach skin probably poly) didn't want to cooperate with a turn it up 1/4 inch and then another 1/4 inch hem.  So I had to do a baby narrow hem.  Press up a scant 1/4 inch, using my edge-join foot, sew a tiny hem, trim the excess away.  Turn it up & press, again a scant 1/4 inch and sew again.  Then press the hem.  Perfect that time.


These are the elastic waist capri's I like to wear in the summer.  I found a cool tattoo ink dragon embroidery design and put on the pockets and the right leg.  I love how they turned out.  I love how the shirt and capri's look together.

That's all for today and hopefully we'll get pictures later on.

Later!

Saturday, June 23, 2012

Butterick 5786 - New pattern

I'm making view B; I'll be adding the collar.  This is one of the newer Butterick patterns that followed me home.

If you've purchase this pattern, take a look at the pieces, you'll see the grain is changed to layout the front and back on the bias.  Although this no doubt adds to the drape, it also creates real issues with construction.  Soooo, after consulting with Claire K., I've decided not to cut it out on the bias and instead use straight of grain as usual.  I did pin-fit the pattern to Ruby and the pattern reads as semi-fitted instead of the loose-fitting described on the pattern.  So keep this is mind when deciding how to cut it out. 

In looking at the pictures, the back is longer than I like so I'm reducing it by 2 inches.

Since I reduced the length in the back, I had to true up the hemline to match the front again. The hemline won't have quite the dramatic edge to it that the picture has but that's fine with me. 

Now I think I have something to work with and the fabric I've chosen is some black peachskin I got from either Hancock's or JoAnn's; I really can't remember which.  It's been marinating in my stash for quite some time.  LOL.  Now I know black isn't very summery but I love it and don't have much black in the closet any more.  Plus I recently made a pair of capri's that just cry out for a matching black shirt. 

I have it cut out and hopefully will finish it up this weekend and will have more pictures for you.

On another note, Alan had elbow surgery on Friday to remove a rather large bone spur that was causing him quite a lot of pain.  It went very well and the surgeon came to me afterward to say it was rather large and had shattered.  So he already feels better though he has to wear his arm in a sling for a few days and take it easy.  That's like asking a tiger to change his stripes.  LOL.

I hope you all are having a really nice weekend.

Tuesday, June 19, 2012

B5611 for real this time


Remember this back facing piece created in my post about B5611?  We'll be using it on this shirt.


I found this really pretty lightweight, poly/cotton pinstripe at Hancock Fabrics of all places.  Perfect summer weight fabric.  I starched this bit of fabric, serged the edge with matching pink thread and sewed one of my newly made labels to it.


Note:  In case you didn't know, starch gives added body, making it easier to handle a thin fabric.


Then I just pinned it to the inside back and sewed it down with a 2.5mm straight stitch. 

I also got the front bands sewn and the left pocket attached.


Here's the resulting shirt.  Again I just love how it fits and feels.  It's like wearing nothing.  LOL.  There's just enough shaping for it to be flattering, yet comfortable at the same time.


If you look closely, you can see the sewing around the facing I placed on the inside back.  Remind you of rtw?  LOL.


I've made another in white, with white on white embroidery.  I'll put pictures of it up soon.

Later!


Friday, June 15, 2012

McCall's T-shirt 6566

If you look at the pattern photos, the young girls wearing these T-shirts have the arms cut out of the photos.  Even this picture I pulled from the pattern website, didn't show you both arms and I'll bet they have it pinned behind her.  They didn't want you to see how bad it looks.  I made up view D, without the pocket, to test for fit.  I cut out the size L (size 16-18) and made it up in some lightweight french terry I had left over from another project.  Funny, its almost the same color as the Tee with the lace overlay.  And it's not typically I color I can wear.  Yeah, well...we all screw up in our color choices now and then.  LOL.  But it is a good test fabric to use for the Tee. 

It's a totally easy shirt to make up and I made it as they did in the pattern instructions.  But I had the foresight (thank goodness!) to pin fit the sides.  If you make it up with no changes, you will be wearing a bag!  Sooo, I wound up making a few changes.  LOL. 


As you can see by the picture to the right, I laid both the front and back pattern pieces on top of each other matching up the side and underarm seams.  I kept the pieces I removed from the top and used them to make my changes to the pattern pieces.  I didn't mess with the length.  It seemed just fine to me. 

I do like the pattern after making these changes.  And I'll probably make it up several times.  I like the lace overlay and have some in my stash so I'll be making that version.  I especially like the striped view too.  You could also color block the striped view and I think that would be a fun look.


Here's the front where I rescued it from total plainness by embroidering a John Deere lace design on a scrap of fabric and did a raw edge applique to the front.  Even tho it's a muslin, it's wearable and I like it.  LOL. Oh one warning.  The neckline is a little wider than I like so the next time I make it, I will be fixing that.  But for some dumb reason, it doesn't gape when you bend over. 


Oh I thought you might like to see the lace applique up close too. 


The front hemline is shorter than the back.  I like that; I think it's rather flattering and it seems to hit me in just the right spot.  But remember I'm 5'8" and if you're shorter, you will want to shorten it.

Overall, I like it!

Wednesday, June 13, 2012

Re-organizing - Kinda

I'm trying to get my studio a little more organized.  I can't find things and when I do, I have 14 of them.  Gah!  So Alan and I went to the home store and purchased some white pegboard.  Those sheets are 4'X8'.  We had them cut it in half longways and now I have 16' of usable storage area on my walls.  My studio is 16'X15' so I have a lot of usable wall space.  And now I've used it all.  LOL.  I'm trying to get stuff off my tables and onto the pegboard wall.  So I'm trying things out in different locations on the wall and trying to make it logical; you know, embroidery stuff by the embroidery machine, sewing stuff by the sewing machine.  Here's a few pictures:
The table on the left houses my serger and coverstitch machine.  Some of my embroidery/sewing threads are on the shelves above along with stabilizers.  You can see a good part of the pegboard too.  The table on the right houses my Babylock Ellegante which I use for sewing 90% of the time.  That little bit of green showing in the lower right corner is my cutting table sticking out.  The brown blob in the lower left is my little love seat where I sit to do handwork.
My computer is on the right along with my Ellisimo and lots of stabilizers and a Madeira thread chest.  My goal to get a lot of stuff off my tables is still to be realized.  LOL.  I'm a messy organized sewist.  That makes sense, right?
And here is my unlovely ironing station.  Tee hee.  I really think I have too much stuff.  Nah...
And this "oh so lovely" 3 drawer lateral filing cabinet houses my pattern collection.  I was looking on Craig's list one day and saw one of our local furniture rental businesses had 2 of these for $150.00.  I purchased both.  Turns out they were used the US Census Bureau when they were in town.

My room isn't pretty; it's more functional.  Someday I'll have pretty.  

That's all I have for today.  Later!

Thursday, June 7, 2012

Show and Tell Time...

I think you remember me mentioning I teach on Wednesdays.  I have anywhere from 4 - 6 students at a time.  We recently completed a class project of embroidering and sewing Vogue 8708.  3 of my students actually made it for the photo op; unfortunately our 4th student, Judy, had to work today.  I just have to brag about them.  LOL.  They did such a great job on all of their shirts!
From left to right, we have Betty in her hot pink linen, then Carol as ever in purple linen, Cheryl in her rusty rose linen and finally me in my pink.  I'm so proud of them!

Later!

Sunday, June 3, 2012

Anniversary Bash...

This weekend we attended the 50th wedding anniversary re-affirmation ceremony and reception in Yukon, Ok which is a suburb of OKC.  It was a 2 hour drive on Friday evening.  We spent the night at a Comfort Suites hotel close to the venue.  We've known this couple for over 20 years and are great friends with their son and his wife having worked with him at the Space Center while living in Florida.  It was fun and great to see everyone again.  We even made a few new friends in the family.  

I thought you might like to see the outfit/ensemble I labored over for so many weeks.  Here I am again squinting in the sunlight all duded up.  LOL.
There was all manner of dress at the reception from tons of rhinestones to couldn't be bothered blue jeans.  I placed somewhere in the middle which I was happy to see.  

Later!